Raspberry PI is a great little tool for building small projects, from personal web servers to robot butlers. With it’s linux core you could potentially use RPI like a regular linux box. There are loads of example projects available on the internet. Here I will present how to use RPI to build a poor man’s surveillance camera using an ordinary web cam. I found an old web cam in the drawer, I seldom open, that came in handy for this project.
The idea is pretty simple, stream the captured web-cam video over the internet in almost real-time. So here is what we need for this project:
- Raspberry PI
- Wifi adaptor (Network connectivity)
- USB Web cam
I will assume that RPI is connected to the internet, so will skip the setup of point #2 in the list above.
The first step is to connect the web cam to RPI. After that check if RPI can recognize it, by running the following command:
lsusb
This will list all the usb devices and you should also see the web cam in the list.
Now what we need is a RTP (Real-time Transfer Protocol) server; for this purpose we’ll use NnginX web server and build it from source with the RTP module to stream the video. So lets download, build and install it.
cd ~
mkdir tmp
cd tmp
wget http://nginx.org/download/nginx-1.9.7.tar.gz
wget https://github.com/arut/nginx-rtmp-module/archive/v1.1.7.tar.gz

tar -xvzf nginx-1.9.7.tar.gz
tar -xvzf v1.1.7.tar.gz

cd nginx-1.9.7
./configure --add-module=~/tmp/nginx-rtmp-module
make
sudo make install
After this we’ll configure RTP on Nginx in the /etc/nginx/nginx.conf file.
worker_processes  1;

events {
  worker_connections  10;
}

rtmp {
  server {
    listen 1935;
    notify_method get;

    application live {
      live on;
    }
  }
}
And then restart the server
sudo service nginx restart
The server is all setup to stream the video. What we need to do now is capture and send the video to nginx for streaming. For this we can either use ffmpeg or avconv. I will use avconv in this example.
First install avconv
sudo apt-get install libav-tools
After this we’ll start the video capture and send it to nginx. We can do this with the following command.
avconv -f video4linux2 -s 320x176 -r 10 -b 350k -i /dev/video0 -vcodec libx264 -preset ultrafast -f flv -an rtmp://localhost/live/cam
You can play with settings to increase the video size and buffer etc.
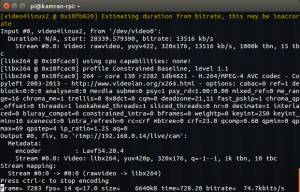
Once the streaming starts you will see something like below on the shell terminal:
To view the video I used VLC player, which is the best open video player available that can literally play whatever you throw at it. So point the web cam to what you want to capture and open the following URL in VLC (replace <rpi-ip> with the IP of your Raspberry PI).
rtmp://<rpi-ip>/live/cam
Here I am keeping an eye on my guitar which has been suspiciously going out of tune lately.


1 Comment
… [Trackback]
[…] There you will find 1905 more Infos: kamranzafar.org/2015/11/29/real-time-web-cam-surveillance-with-raspberry-pi/ […]